
Herb-Roasted Chicken Thighs with Roasted Cauliflower Rice: A Complete Guide to a Juicy, Low-Carb Dinner
July 20, 2026
Luxury French Lemon Tart with Swiss Meringue: A Complete Guide to a Bright, Elegant Classic
July 20, 2026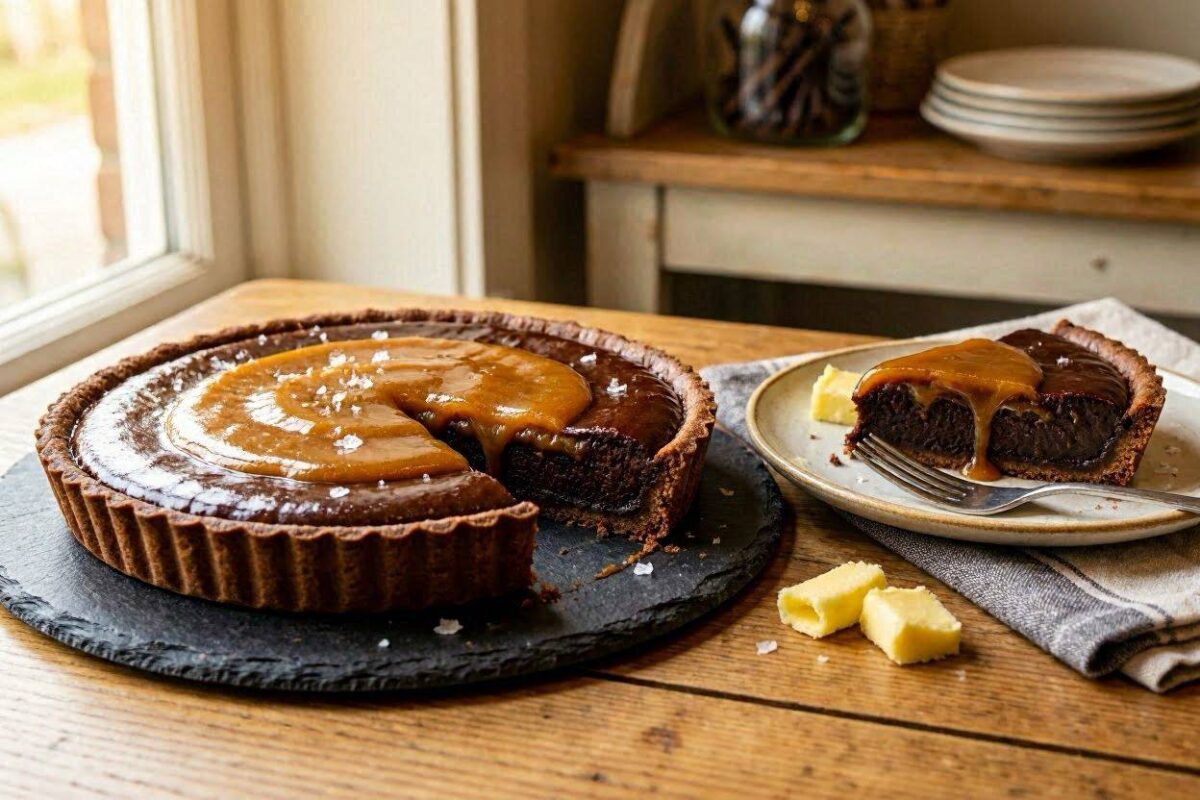
Last updated: July 23, 2026 · By Sarah, home cook and recipe developer
Some desserts try to do too much at once, and end up doing nothing particularly well. A classic dark chocolate tart with salted butter caramel is the opposite — a handful of components, each done properly, that together create something genuinely impressive without unnecessary complication. A crisp, buttery shell, a silky dark chocolate filling, and a layer of salted caramel in between make this one of those desserts that looks like it came from a professional pastry case, despite being entirely achievable in a home kitchen.
I started making this tart for dinner parties after getting tired of bringing the same predictable dessert every time. The first attempt taught me the hard way that rushing the caramel is never worth it — a few seconds of inattention and it goes from perfectly amber to burnt and bitter. Since then, I’ve made this tart enough times to feel confident walking through exactly where things can go wrong and how to avoid it.
In this article, we’ll walk through the reasoning behind each component of this tart, common pitfalls at each stage, and a detailed, step-by-step method for pulling it all together with confidence.
Understanding the Three Components
This tart comes together in three distinct layers, each requiring its own technique, but none of which is particularly difficult once you understand what you’re aiming for.
The Tart Shell
A good tart shell needs to be sturdy enough to hold the caramel and chocolate filling without becoming soggy, while still being tender and buttery rather than tough. This is achieved through a classic pâte sucrée (sweet shortcrust pastry), which relies on cold butter and minimal handling to prevent the gluten in the flour from developing too much, which is what leads to a tough, chewy crust rather than a crisp, sandy one.
The Salted Butter Caramel
Caramel is simply sugar cooked until it browns and develops complex, slightly bitter, toasty notes through a process similar to the Maillard reaction seen in roasted or seared foods. Butter and cream are then added to stop the cooking and create a smooth, pourable sauce, while a pinch of good flaky salt cuts through the sweetness and rounds out the flavor, preventing the caramel from tasting one-dimensionally sugary.
The Dark Chocolate Filling
The chocolate layer is a simple ganache — chocolate melted together with warm cream — that sets into a firm but silky texture once chilled. Using a good-quality dark chocolate, with a cocoa percentage in the 60–70% range, provides a deep, slightly bitter contrast to the sweetness of the caramel below it, keeping the finished tart from becoming cloying.
Why Technique Matters More Than Fancy Ingredients Here
Unlike some desserts that rely on a long list of specialty ingredients, this tart succeeds largely on technique — chilling the dough properly, watching the caramel closely as it cooks, and giving each layer enough time to set before adding the next. Rushing any one of these steps is the most common reason home versions of this tart come out less polished than the version in a bakery case.
Ingredients (Serves 8–10)
For the tart shell:
- 1 1/4 cups all-purpose flour
- 1/4 cup powdered sugar
- Pinch of salt
- 1/2 cup cold unsalted butter, cubed
- 1 egg yolk
- 2–3 tablespoons ice water
For the salted butter caramel:
- 1 cup granulated sugar
- 6 tablespoons unsalted butter, cubed, at room temperature
- 1/2 cup heavy cream, warmed
- 1 teaspoon flaky sea salt, plus more for garnish
For the dark chocolate filling:
- 8 oz dark chocolate (60–70% cocoa), finely chopped
- 1 cup heavy cream
- 1 tablespoon unsalted butter
Step-by-Step Preparation
Step 1: Make the Tart Shell
In a food processor, pulse the flour, powdered sugar, and salt together briefly to combine. Add the cold cubed butter and pulse until the mixture resembles coarse crumbs. Add the egg yolk and one tablespoon of ice water, pulsing until the dough just begins to come together, adding more water a teaspoon at a time only if needed. Turn the dough out, shape it into a disk, wrap it, and refrigerate for at least 30 minutes.
A note from testing this recipe: The first few times I made this crust, I over-processed the dough trying to get it perfectly smooth, and it baked up noticeably tougher than it should have. Stopping the moment the dough just barely comes together — even if it still looks a little shaggy — makes a real difference in the final texture.
Step 2: Blind Bake the Crust
Preheat your oven to 375°F (190°C). Roll out the chilled dough and press it into a 9-inch tart pan with a removable bottom, trimming any excess. Prick the bottom with a fork, line it with parchment paper, and fill with pie weights or dried beans. Bake for 15 minutes, then remove the weights and parchment and bake for another 8 to 10 minutes, until the crust is golden and fully set. Let it cool completely before filling.
Step 3: Make the Caramel
In a heavy-bottomed saucepan, heat the granulated sugar over medium heat, without stirring, swirling the pan occasionally as it begins to melt. Once it turns a deep amber color, remove from heat and carefully whisk in the cubed butter until fully incorporated — the mixture will bubble vigorously, so add it gradually. Slowly whisk in the warmed heavy cream, followed by the flaky sea salt. Let the caramel cool slightly before pouring it into the cooled tart shell.
Step 4: Chill the Caramel Layer
Refrigerate the tart for about 20 minutes to allow the caramel layer to firm up slightly before adding the chocolate filling on top.
Step 5: Make the Chocolate Ganache
Place the finely chopped chocolate in a heatproof bowl. Heat the heavy cream in a small saucepan just until it begins to simmer, then pour it over the chocolate. Let it sit undisturbed for about 2 minutes, then stir gently until smooth. Stir in the butter until fully melted and glossy.
Step 6: Assemble and Chill the Tart
Pour the chocolate ganache over the chilled caramel layer, tilting the tart pan gently to spread it evenly. Refrigerate for at least 2 hours, or until the chocolate layer is fully set.
Step 7: Finish and Serve
Just before serving, sprinkle a small amount of flaky sea salt over the top of the tart for both flavor contrast and visual appeal. Remove the tart from the pan and slice with a sharp knife, wiping the blade clean between cuts for neat slices.
Tips for Success
Don’t stir the sugar while it’s melting for caramel. Stirring at this stage can cause the sugar to crystallize unevenly. Swirling the pan gently is a safer way to encourage even melting.
Watch the caramel closely. The difference between perfectly amber and burnt can happen in a matter of seconds, so it’s best to stay near the stove rather than stepping away during this step.
Use good-quality chocolate. Since the chocolate filling is one of only three components in this tart, its quality has an outsized impact on the final flavor — a chocolate you’d enjoy eating on its own is a good indicator it will work well here.
Let each layer set before adding the next. Rushing the caramel or chocolate layer before it’s had time to firm up can cause the layers to blend together rather than staying distinct when sliced.
Wipe your knife between slices. A clean, warm knife (run briefly under hot water and dried) creates much cleaner slices through the set caramel and chocolate layers.
Serving Suggestions
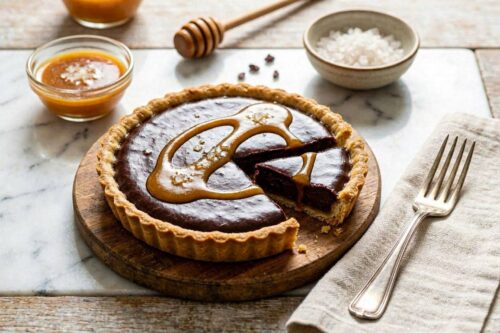
This pie is rich enough to be served in relatively small slices, making it ideal for large gatherings. A dollop of mild whipped cream or a small scoop of vanilla ice cream adds a wonderful flavor boost, balancing the sweetness of the caramel and chocolate. It also keeps well in the refrigerator for several days, making it a great option for making ahead at dinner parties.
Frequently Asked Questions
Can I make this tart ahead of time? Yes — in fact, it benefits from being made a day in advance, since the layers have more time to fully set and the flavors have time to meld. Store it covered in the refrigerator and add the finishing salt just before serving.
What went wrong if my caramel seized up when I added the butter or cream? This usually happens when the added ingredients are too cold, causing the sugar to harden suddenly. Using room-temperature butter and warmed cream, and adding them gradually while whisking, helps prevent this.
Can I use a store-bought tart shell to save time? Yes, a pre-made shortcrust tart shell can be substituted, though the flavor and texture of a homemade shell are noticeably better and worth the extra effort for a special occasion.
How long does this tart keep, and can it be frozen? It keeps well in the refrigerator for up to four days. Freezing is possible but can slightly affect the texture of the caramel layer upon thawing, so refrigeration is the better option if serving within a few days.
About the author: Sarah is a home cook who develops and tests recipes focused on simple, wholesome ingredients. [You can expand this with relevant background — e.g., years of baking experience, pastry training, or a link to your recipe archive — to strengthen trust signals for readers and search engines.]
Final Thoughts
Classic dark chocolate tart with salted butter caramel proves that an impressive dessert doesn’t require an impossibly long ingredient list — just careful attention to a few key techniques. With a crisp, buttery shell, a rich caramel layer, and a deep, silky chocolate ganache, this tart delivers restaurant-quality results in a home kitchen, and its make-ahead nature makes it a genuinely practical choice for entertaining.