
🥧 Warm Classic American Apple Pie with Cinnamon and Roasted Almonds
July 21, 2026
Chicken Kabsa – Sarah’s Authentic Saudi Rice Dish That Tastes Like Home
July 21, 2026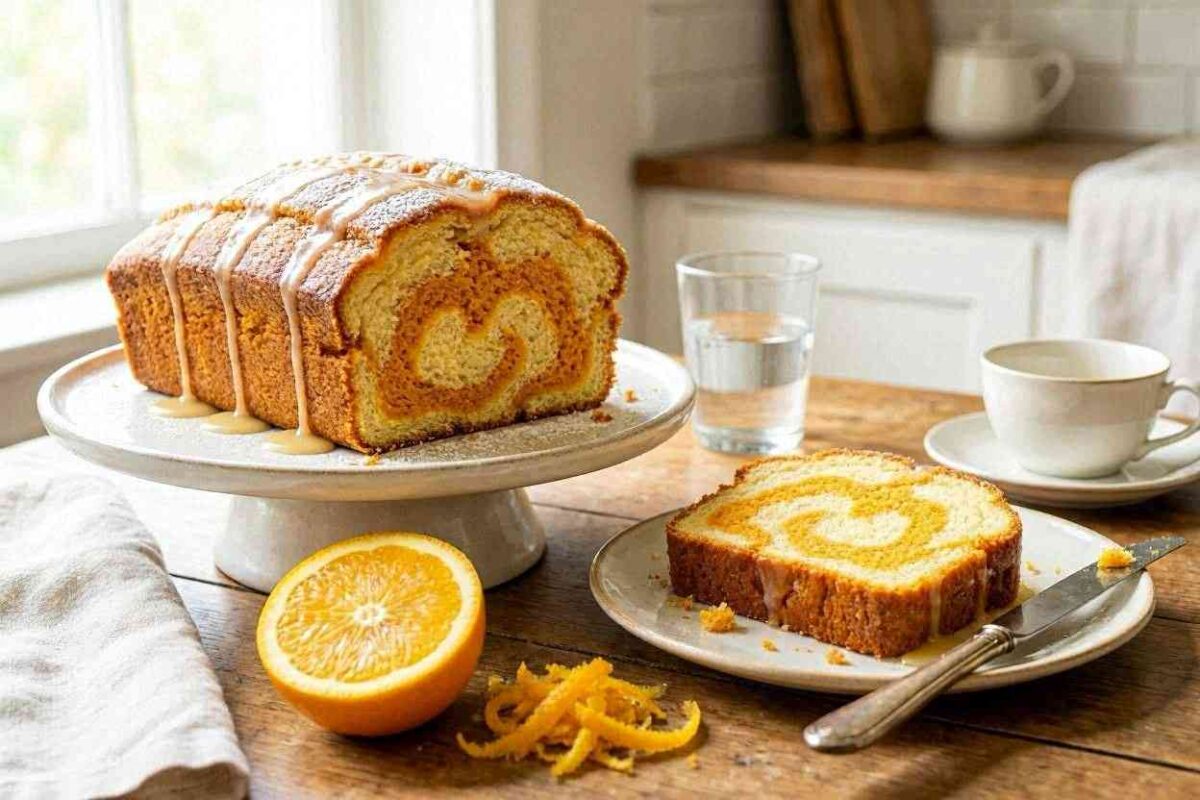
Introduction – A Word from Sarah
I’m Sára, and as you probably know, my kitchen isn’t just a room for cooking — it’s where memories are made.
Whenever I smell fresh oranges, I’m instantly transported back to my childhood, to my grandmother’s kitchen, where she would spend hours making us her famous orange cake.
She used to tell me when I was little: “Oranges, Sára, are the smile of winter.”
Back then, I didn’t understand she was talking about love, not just fruit.
Today, as a mother myself, I’ve come to realize that a cake isn’t just ingredients — it’s a story we tell with butter and sugar.
This recipe I’m sharing with you today is Sára’s recipe, perfected after dozens of attempts, and I’m gifting it to you so you too can be part of these beautiful memories.
Why This Cake Is Special in Sarah Kitchen
I’m Sára, and I’ve tried countless orange cake recipes, but they always turned out dry or lacking in flavor.
After many experiments, I finally developed my own signature recipe that relies on:
-
Fresh whole oranges (zest, juice, and pulp) for a rich, authentic flavor.
-
The perfectly creamed butter technique that gives the cake a velvety, melt-in-your-mouth texture.
-
A light glaze that adds a beautiful shine and a subtle tangy touch.
Ingredients – From Sarah Kitchen
Dry Ingredients:
-
2 cups all-purpose flour (well sifted).
-
1½ teaspoons baking powder.
-
½ teaspoon baking soda.
-
A pinch of salt (½ teaspoon).
Wet Ingredients:
-
1 cup unsalted butter (room temperature).
-
1½ cups fine white sugar.
-
3 large eggs (room temperature).
-
1 teaspoon pure vanilla extract.
-
Zest of 1 large orange (finely grated).
-
½ cup freshly squeezed orange juice.
-
½ cup warm milk (not hot).
For the Marble Swirl:
-
2 tablespoons raw cocoa powder (sifted).
-
2 tablespoons warm milk (extra).
-
1 teaspoon brown sugar.
For the Light Glaze:
-
1 cup powdered sugar (very fine).
-
3-4 tablespoons freshly squeezed orange juice.
-
½ teaspoon orange zest (for garnish).
Step-by-Step Method – Sarah Golden Steps
Step 1: Prepare the Oven and Pan
I’m Sára, and my most important tip for you is: never neglect preparing your pan properly.
Preheat your oven to 180°C (350°F), grease your pan with butter and dust it with flour, or line the bottom with parchment paper.
Sára’s Tip: I used to forget to grease the sides, and my cake would stick. Now I grease it with love, because sticking used to ruin its beautiful shape.
Step 2: Cream the Butter and Sugar
In your mixer bowl, beat the butter and sugar for 5-7 minutes until the mixture becomes pale and fluffy.
Sára’s Tip: This step is the secret to an airy cake. Don’t rush it — patience here makes all the difference.
Step 3: Add the Eggs and Vanilla
Add the eggs one at a time, beating for about a minute after each addition.
Then add the vanilla and orange zest, and beat until everything is well combined.
Step 4: Alternate Dry and Wet Ingredients
-
Add one-third of the flour with the salt, and mix on low speed.
-
Add half of the orange juice and warm milk.
-
Repeat (flour – liquid – flour) until you finish all the ingredients.
Sára’s Warning: Don’t overmix once the flour is added, or your cake will become rubbery. I’ve made this mistake many times and learned from it.
Step 5: Prepare the Marble Mixture
In a small bowl, mix the cocoa powder with the warm milk and brown sugar until you get a smooth paste.
Take one cup of the yellow batter and blend it thoroughly with the cocoa mixture.
Step 6: The Magical Marbling Technique – From Sarah
-
Pour half of the yellow batter into the pan.
-
Drop spoonfuls of the cocoa mixture in scattered dots.
-
Top with the remaining yellow batter.
-
Using a long knife or skewer, gently swirl in a spiral motion only 4-5 times.
Sára’s Famous Mistake: The first time I made this, I swirled 20 times, and the lines disappeared completely — the cake came out one uniform brown color. I learned that marbling needs a light touch.
Step 7: Baking
Bake for 35-40 minutes. If you notice the top browning too quickly, cover it loosely with aluminum foil after 25 minutes.
Step 8: Prepare the Glaze
Remove the cake from the oven, let it rest in the pan for 10 minutes, then transfer it to a wire rack to cool completely.
Sára’s Tip: Don’t rush to add the glaze on a warm cake — it will melt and disappear.
For the Glaze:
-
Sift the powdered sugar into a bowl.
-
Gradually add the orange juice until you get a thick yet pourable consistency.
-
Stir in the orange zest.
Step 9: Serving – Sarah Final Touch
Pour the glaze over the completely cooled cake, letting it drizzle naturally over the edges.
Garnish with dried orange slices or crushed pistachios.
Secrets to Success – From Sára’s Experience
| Question | Sára’s Answer |
|---|---|
| Why isn’t my cake refreshing? | You probably used bottled juice instead of fresh, or cold milk instead of warm. |
| Can I use oil instead of butter? | Yes, but butter gives a richer flavor. I personally always prefer butter. |
| How should I store the cake? | Wrap it in plastic wrap and refrigerate. It stays fresh for up to 3 days. |
| Can I freeze it? | Yes, without the glaze. Freeze it and thaw it overnight in the fridge. |
Nutritional Value (Per 100 grams)
| Nutrient | Amount |
|---|---|
| Calories | 310 kcal |
| Total Fat | 16 g |
| Carbohydrates | 38 g |
| Protein | 4 g |
| Dietary Fiber | 1.5 g |

Sarah Serving Tips
-
Serve the cake with Earl Grey tea or cold brew coffee.
-
Dust a light sprinkle of cinnamon to deepen the orange flavor.
-
For special occasions, serve it with a homemade orange caramel sauce.
Conclusion – A Message from Sára to You
I’m Sára, and whenever I take this cake out of the oven, and I see my family gathering around it, and I hear my little daughter say: “Mom, the smell reminds me of holiday days at Grandma’s house,” I feel like I’ve baked more than just a cake.
I’ve baked a beautiful moment, and created memories that will stay in their hearts for years.
Cooking isn’t just recipes — it’s the language we use to understand each other when words fail.
I truly hope you try this recipe and share your experience with me.
Did you manage to get those beautiful marble lines?
Share your results with me, because your success in your kitchen is my success too.
With love, Sarah